Ford Figo 1.6 TDCI 75 Stage 1 – DPF Safe Remap (123 BHP
| 300 Nm
)
The Ford Figo 1.6 TDCI 75 BHP variant is usually identical to the more powerful 95 variant. Please check that the car comes with a factory fitted intercooler, if not we will need to make a slighly less powerful remap.
For 75 BHP variants with an intercooler fitted the Stage 1 remap will deliver 123BHP and 300Nm. Our stage 1 remap provides constant smooth torque through the entire rev range whilst remaining well within the safe limits of your clutch and turbo charger.
The DPF system will not be affected by this remap as we remain well within stock air fuel ratios to promote a clean sootless burn.
Price:
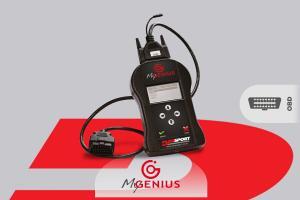
- Program yourself with the MyGenius OBD tool, includes a Stage 1 Remap for just £290!
- Already have a programming tool? Use our Online remap service for just £150
- Send us your ECU – Postal Remap Service from £200
- Drive in or mobile remap from £325
-

MyGenius OBD Tool
£190.00 – £789.00 Select options This product has multiple variants. The options may be chosen on the product page -

Online Remap Service
£60.00 – £350.00 Select options This product has multiple variants. The options may be chosen on the product page -

Postal Remap Service
£75.00 – £450.00 Select options This product has multiple variants. The options may be chosen on the product page
Ford Figo 1.6 TDCI 75 Stage 1 + With performance exhaust (126 BHP
| 300 Nm
)
The Stage 1 + remap for the Ford Figo 1.6 TDCI 75 is designed for those who want that little bit extra and also have a performance exhaust fitted. Peak power with this remap is 126 BHP and peak torque comes out at 300Nm making a big difference to the way your car drives.
For best results, run a straight through exhaust system with a straight through back box. You can also upgrade to a high flow air filter. Avoid using oiled filters as these can degrade the MAF element and cone filters usually suck more hot air from the engine bay.
Want to see a direct comparison of the HDI Tuning remap vs one of our competitors remaps? Then take a look at this dyno plot HERE.
Price:
- Program yourself with the MyGenius OBD tool, includes a Stage 1 Remap for just £290!
- Already have a programming tool? Use our Online remap service for just £150
- Send us your ECU – Postal Remap Service from £200
- Drive in or mobile remap from £325
Stage 2 (130 BHP
| 310 Nm
)
The stage 2 remap requires an upgraded intercooler and also an upgraded exhaust system. The intercooler should be as large as you can fit behind the bumper, this makes a big difference on the 1.6 8v engine as we found the intercooler to suffer from heat soak when run consistently hard or on a dyno. The exhaust can be 2.5 inch all the way through with a free flowing type silencer.
With the uprated intercooler and exhaust system we can take you up to 130 BHP and 310Nm. This remap can be ran with the DPF intact, we did extensive testing with this much heavier remap and found the DPF stayed perfectly clean (this assumes you will do regular long journeys to allow the vehicle to get up to temperature).
Price:
- Program yourself with the MyGenius OBD tool, includes a Stage 2 Remap for only £380
- Already have a programming tool? Use our Online remap service for £200
- Send us your ECU – Postal Remap Service from £250
- Drive in or mobile remap from £350
Stage 3 – Turbo upgrade (150 BHP
| 320 Nm
)
We’ve spent a lot of time working on a VNT turbo upgrade. The turbo used here is a GTD1244VZ from the 1.5 TDCI 120 model, this fits with very little modifications required. You’ll see great performance figures with 320Nm torque and 150 BHP. Thanks to the larger turbo you’ll have a lot more top end power compared to the original TD02 turbo.
To get optimum performance you need to fit an uprated front mount intercooler and also and free flowing exhaust system of 2.5”.
There is no need to upgrade the injectors or any other parts. A full fitment guide is available here.
You cannot run this turbo upgrade without a remap and also modification to the turbo position sensor wiring, don’t fit the turbo until you have the remap ready to go on. This is important as going from a waste-gated turbo to a VNT turbo requires the turbo control software to be modified so that the ECU can safely regulate the boost of the VNT turbo.
We’re also in the process of developing GTD12 49mm Hybrid VNT software for this engine which should be ready fairly soon!
- Program yourself with MyGenius OBD tool, including HDI Tuning Stage 3 Software £399
Programming Methods – OBD2 or bench programming
The Ford EDC17C10 and EDC17C70 are easy to program over OBD. Dimsport MyGenius is able to do this over OBD and offers full programming capabilities with the option to change maps whenever you choose.
Recommended programming method:
Program over OBD using the Dimsport MyGenius standalone tool
The Dimsport MyGenius tool is the safest, easiest and most reliable way to program your ECU from home. Simply connect to the OBD port and let the tool do the work, no need to remove your ECU or bench program for most ECU types. For more information have a read here
Programming via OBD EDC17C10
- 1. Obtain a suitable programming tool; we recommend to use Dimsport MyGenius, you can also use Kess V2.
- Install the tool to a reliable laptop.
- Connect to the OBD port of your car, make sure you have backup chargers to the vehicle battery and the laptop battery.
- ID the ECU and then take a read of the ECUs flash memory.
- Email the software to remap@hdi-tuning.co.uk along with a description of the remap you require.
- Send payment through our webshop.
- We will modify the software and send back to you. This normally takes less than 2 to 3 hours during working days.
- Using the same tool, ID then write to the ECU. This will overwrite the ECUs flash memory, it’s important not to interrupt the process. If you encounter any problems we can fix the ECU for you so there’s absolutely nothing to worry about.
- Let your engine warm up and then take the car for a spin, enjoy the extra power!
Programming via Bench service mode KTM Bench or PCM Flash
This is our preferred way to program. The ECU must be removed, but there is no need to open the ECU and risk damage. A full backup can be made of both the EEPROM and the internal flash memories, also the external flash can be read on models where this is present.
- Order a tool such as KTM bench or PCM Flash.
- Remove ECU from the vehicle.
- Connect specified wires to ECU plug connector.
- ID the ECU.
- Read the ECU memories.
- Email software to HDI Tuning.
- Wait for us to prepare your remap and return it back to you.
- Program the remap to the ECU using the same method taken to read the ECU.
- Refit the ECU, check engine starts.
- Let your engine warm up and then take the car for a spin, enjoy the extra power!
Programming via KTAG or MPPS Tricore
- 1. Order a suitable tool such as Kess KTAG or MPPS Tricore.
- Install the tool to a reliable laptop.
- The ECU must be removed from the vehicle, and then the lid can be carefully pried open and removed. The best way to do this is with 1 small flat head screw driver, 1 medium, and one large. A heat gun will help soften the sealant. Always start at the end furthest from the flat bonded section of the lid. If you attempt to pry open this end you will damage the ECU. A video guide is available on youtube.
- Connect necessary pins to ECU connector plug.
- Connect boot pin to correct location. There are two processor types available on the EDC17C10 ECU; TC1796 (2MB internal flash, 2MB external flash) and TC1797 (4MB Internal flash).
- ID the ECU.
- Take a read of all memories present.
- Email the software to remap@hdi-tuning.co.uk along with a description of the remap you require.
- Send payment through our webshop.
- We will modify the software and send back to you. This normally takes less than 2 to 3 hours during working days.
- Using the same tool, ID then write to the ECU. This will overwrite the ECUs memory, it’s important not to interrupt the process. If you encounter any problems we can fix the ECU for you so there’s absolutely nothing to worry about, if you made a backup of all memories you’re extra safe in the event that something were to go wrong.
- Straighten the lid on the ECU and seal with a little silicone.
- Refit the ECU and start the engine.
- Let your engine warm up and then take the car for a spin, enjoy the extra power!


